I completed the following project for a digital forensics class during my coursework. The first section is the plan to execute the assessment that involves how evidence will be collected, how to handle evidence, tools that will be used, and more. The second section shows a step by step guide of actions taken on the data provided using Autopsy.
Scenario
An oil company’s senior management has reason to suspect that John Smith, one of the company’s mechanical engineers allegedly took information that was clearly identified as proprietary. The company’s legal office has requested digital evidence regarding the potential violation of company policy, which prohibits the sharing of proprietary information without prior approval. The employee was not authorized to access proprietary information. All employees sign nondisclosure agreements (NDAs) and acceptable use policies (AUPs). Senior management and the legal office have approved this request. You are a member of the investigative team that has been asked to develop an investigative plan of action. Create an investigative plan of action based on forensic best practices or standards that your team will implement
Section 1
Digital Forensics in Cybersecurity
Western Governors University – D431
Tyler Gaytan
BFN2 Task 1: Investigative Plan of Action
A1. Discuss the strategy that your team will use to both maximize the collection of evidence an minimize the impact on the organization.
The first step to an investigation is the need for one caused by an incident. The organization in the scenario suspects that proprietary info has been accessed and potentially shared by an unauthorized employee. It is stated that this goes against their Non-Disclosure Agreement (NDA) and the Acceptable Use Policy (AUP). Having these policies from the organization for review will better help the forensic team on determining the scope of their investigation and what type of data to search for.
The organization providing information such has operating systems, hardware, software, and/or network devices that may need to be analyzed would better prepare the forensic team. This can help determine which tools, applications, techniques, or software the team will need to use. The team may also need to call in additional resources such as a specialist if a member does not have adequate expertise.
The legal aspect of the search and seizure can be addressed as well. Based on “Searching and Seizing Computers and Obtaining Electronic Evidence In Criminal Investigations” and the scenario given, this is a workplace search. The forensic team has permission from senior management and from the organization’s legal team to obtain evidence. As a result, the employee cannot claim expectation of privacy or that his 4th Amendment right as been violated due to the circumstances and appropriate consent given (Jarrett et al., n.d.).
The forensic analyst should also brief the team members that will be involved in the investigation. The brief should include the incident including when it is suspected to have occurred, suspected employee information, which devices will need to be analyzed, and data that is considered proprietary or against the AUP. This will ensure that the team’s efforts are focused, organized, and an appropriate amount of time to prepare any equipment or documentation, such as chain of custody forms.
All the steps discussed to this point are preparation. A lot of this information can be communicated during a brief or meeting between the organization and the forensic team. This will decrease the amount of time the forensic team will be present organization’s work environment, thus minimizing the impact on the organization.
Another step that can help minimize the impact on the organization is to remove the system in question from the network. This can provide network segmentation where the forensic team can acquire their data while normal operations occur. Always ensure that the scene is secure and that data is not altered.
The forensic team should have their framework, methodology and/or process in mind. DoD Cyber Crime Center standards, Digital Forensic Research Workshop (DFRWS) framework, and/or Scientific Working Group Digital Evidence (SWGDE) framework are all resources and/or standards that can be used. NIST SP 800-86 is another and describes the forensic process as follows: collection, examination, analysis, and reporting (Kent et al., 2006).
Maximizing the data that needs to be collected can be outlined in NIST SP 800-86. The forensic team needs to prioritize data by likely value, volatility, and amount of effort required to acquire data. Once these principles are followed and data is acquired, then the integrity of the data needs to be verified to ensure it has not been tampered with (Kent et al., 2006).
All evidence and data should be transported to a secure facility or lab. If possible, there should be no stops from where the evidence was obtained to where it will be stored. Also, the area the evidence is stored, needs to be secure, whether it is a vault, faraday cage, or locked down facility. All measures need to be taken to ensure that no evidence can be accessed by unauthorized personnel or malicious actors.
A2. Describe the tools and techniques your team will use in evidence gathering, preparation, and analysis.
One tool that can be used is Forensic ToolKit (FTK) by AccessData. This application offers many features that will suffice for the needs of this investigation. This will provide a means to create a bit-by-bit copy of the data that needs to be analyzed as well as hashing it for integrity purposes. FTK will be able to carve any files that were recently deleted to be viewed again. This is very important for a digital forensics investigation, as perpetrators try to delete files or evidence in order to get away with their wrongdoings. Another important feature is running pictures files through steganalysis. Steganography is another method that insider threats can perform to exfiltrate data.
Even though FTK is a widely accepted tool, everything should be double checked against another tool. For this reason we could use EnCase by Guidance Software, but for monetary considerations of FTK and EnCase, the second application used will be Autopsy. This is the GUI form of SleuthKit. Autopsy has many open source features and is commonly used to check results from analysis from other tools.
An important factor to keep in mind when choosing tools and running tests is the Daubert standard. This states that scientific evidence that is presented in a trial has to be tested and reviewed by the relevant scientific community. (reference book) This ensures that your evidence is valid and less likely the defense attorney can find faults in your evidence.
A3. Describe how your team will collect and preserve required evidence using standardized and accepted procedures.
First and foremost, a chain of custody needs to be kept in mind and established. Evidence forms typically have, date/time collected, whom it was collected by, address it was collected from, details of evidence including hashes, and any physical damage. This will be an ongoing form that is added to whenever evidence is access. This preserves the evidence by always keeping accountability of data and who accessed it.
First step to arriving on scene is photograph everything as it is. This is before moving any objects or devices. If the device is still connected to the network, then unplug the switch or router. Photograph the front and back of computer including any cords that are connecting to the computer. Labeling the cords and what they connect to would be beneficial. Take a picture of the computer screen if it is on or after waking from sleep. (United States Secret Service, n.d.).
According to “Digital Forensics, Investigation, and Response” if the computer is on, then there are a few things that may be important to check. The first being to access the Task Manager by pressing CTL+ALT+DEL. This will allow the forensic analyst to view running processes and should be photographed. Two commands that can be ran to determine network communication sessions are netstat and net sessions (Easttom, 2021).
Another command that is useful is openfiles. This will show any files that are open and who opened them. This includes if files were opened remotely. Always document the results of any commands executed. Finally, you want to pull the plug on the computer to interrupt power supply rather than shut down the computer normally. This is to be cautious and consider any malware that could be present on the device that could delete files upon a normal shutdown (Easttom, 2021).
A special consideration is if you suspect the computer to be actively destroying data or evidence. You should pull the power cable as soon as possible to interrupt the process. Another consideration is if you have to perform a live acquisition for highly volatile data (Easttom, 2021). Every step taken should be photograph and properly documented on the chain of custody paperwork. Remember this is to preserve data and provide the company with a solid case if legal repercussions are involved.
A4. Describe how your team will examine the seized evidence to determine which items are related to the suspected violation of company policy.
A bit-by-bit copy should be made of all evidence. The tools that are discussed in A2 have the capability to do this and add a MD5 and/or SHA hash. The hashes are important to verify integrity and no variation between original and copy. The purpose of this is to execute all tests and procedures on the copy rather than the original. This is so your tests and procedures can be repeated by other professionals for verification and keeping the Daubert standard in mind.
Many tools, including the ones chosen in A2, have an ingest that is configured that runs a series of tests and analysis on the data source selected. This will give you results that it flags as potentially significant, carved files, and a plethora of other information. NIST SP 800-86 recommends using text/keyword, pattern, string, or specific log searches to reduce the amount of data that needs to be reviewed (Kent et al., 2006). Thanks to the features of the tools selected, this is easy to do by enter information into a search box or choosing filter options. For the scenario, this could easily search for proprietary information. Another feature could be a chronological record of events the program can construct to determine unusual activity during odd hours.
Other places of interest that can be reviewed are well known logs. This could vary depending on operating system and software. For instance, index.dat, WebcacheV01, and history.dat contain web browser history, cookies, and caches which could be used to determine a violation of the company’s AUP. Fortunately, most forensic tools extract this data for you (Kent et al., 2006).
Another crucial feature is steganalysis. Often, especially insider threats, hide data in various places such as image, sound, and/or video files to exfiltrate data from the network or facility. Certain tools, like FTK, have an entire image detection engine devoted to detecting this.
A5. Discuss an approach that your team will use to draw conclusions based on the digital evidence that supports the claim of a policy violation.
The claim the company has is that the unauthorized user, John Smith, had access and shared proprietary info. The investigation will be based off the company’s NDA and AUP policy, which was addressed in A1. Significant evidence would be the presence or sharing of proprietary files or data that is found on John Smith’s computer that should not be there.
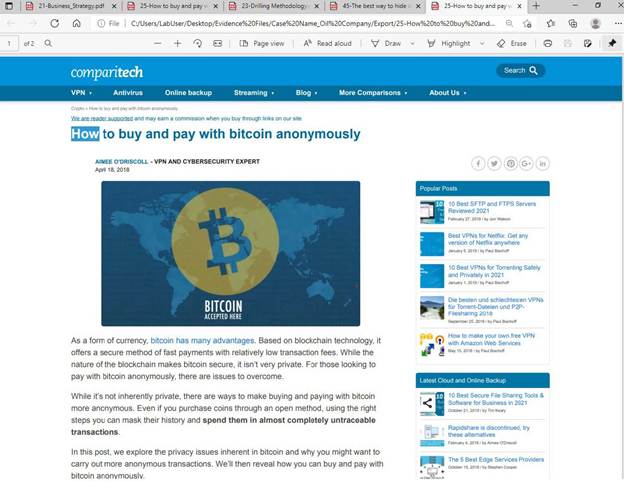
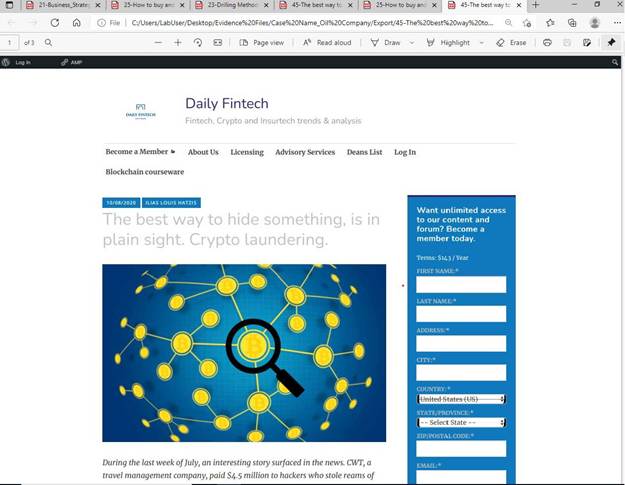
Additionally, other evidence can include inappropriate use of company resources that violate the AUP such as visiting sites outside of an approved list, downloading files, and/or visiting social media sites.
These conclusions can be drawn by following NIST SP 8000-86. Data analysis should include identifying people, places, items, events, and how they correlate to each other. Once the data is analyzed in this way, it will be clear if there is a violation or not (Kent et al., 2006).
A6. Discuss how the case details and conclusions should be presented to senior management.
There should be an expert report of the findings during the investigation. This will outline every test and step that was completed and by who during the investigation. This report should also include your curriculum vitae, which is your specific work experience as a forensic investigator (Easttom, 2021).
Senior management should be given a copy of this report for their records and to use as needed. This report is very detailed and can be lengthy. As a result, it may be beneficial to create a presentation. A presentation can be used as an overview tool to explain the overall process that took place and simplify the results.
Sources
Easttom, C. (2021). Digital Forensics, Investigation, and Response. Jones & Bartlett Learning, LLC. http://ebookcentral.proquest.com/lib/westerngovernors-ebooks/detail.action?docID=6679131
Jarrett, H. M., Bailie, M. W., Hagen, E., & Judish, N. (n.d.). Searching and Seizing Computers and Obtaining Electronic Evidence in Criminal Investigations. Office of Legal Education Executive Office for United States Attorneys, 56.
Kent, K., Chevalier, S., Grance, T., & Dang, H. (2006). Guide to integrating forensic techniques into incident response (NIST SP 800-86; 0 ed., p. NIST SP 800-86). National Institute of Standards and Technology. https://doi.org/10.6028/NIST.SP.800-86
United States Secret Service. (n.d.). Best Practices For Siezing Electronic Evidence A Pocket Guide for First Responders (Vol. 3). United States Secret Service.
Section 2
Digital Forensics in Cybersecurity
Western Governor’s University – D431
Tyler Gaytan
BFN2 Task 2: Forensic Investigation
A1. Describe all steps taken in Autopsy to create the forensic system case file. Provide screenshots of these steps.
The first step to create a case file in Autopsy is to open the application itself. Each step discussed throughout this task will be highlighted in yellow and outlined in red.
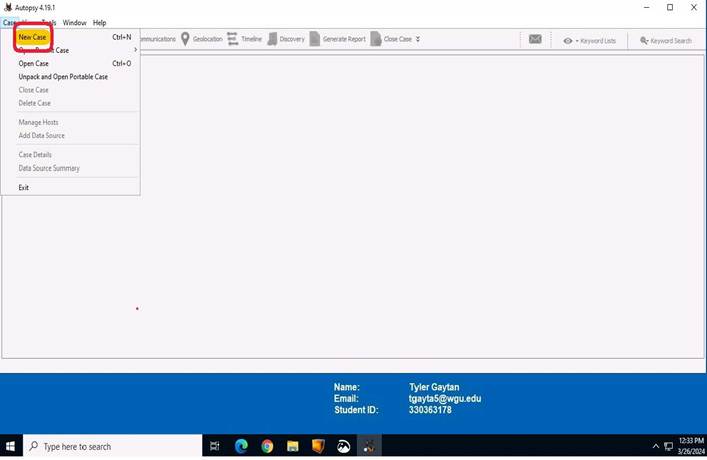
Once you have Autopsy opened you will be prompted to start a new case, open a recent case, or open an existing case if one exists. I had to resize the window and exit out of the initial prompt. The next screenshot is another way to start a new case under the “Case” tab at the top left of the screen.
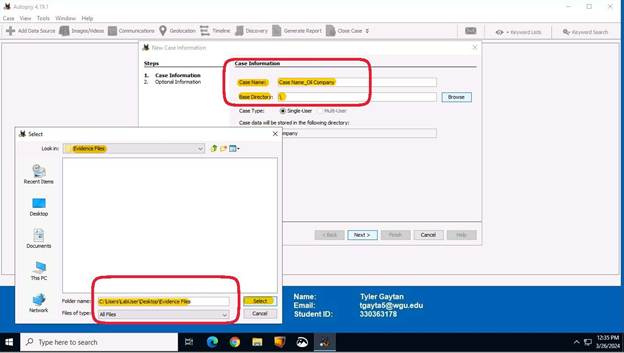
The next step requires you to fill in the case name and the folder name. Once you click browse, an additional window will populate, and you will select the desired location. Once you hit select, then you will be at the second screenshot of this step which will have the directory you selected in the “Base Directory” text box. Click the “Next” button for the next step.
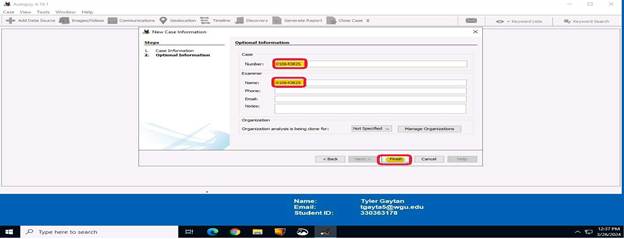
The next window will prompt you to enter a case number in the boxes that are highlighted. After this is complete, then click the “Next” button.
The next set of steps is creating the data source. First step is selecting the host. The option seen in the screenshot below is the default option.
Select the data source type. For this scenario, it will be the “Disk Image or VM File” option.
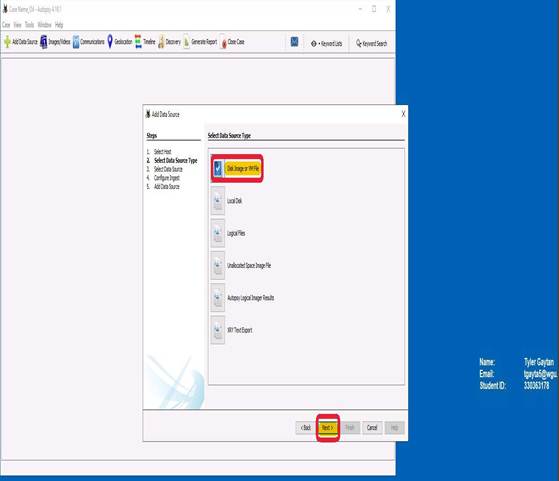
Step three in this process is selecting the data source. The source can be found in the directory if you click “Browse”. Another pop-up will occur, and you can find the file that needs to be selected. The source selected for this case is JSmith_Q1.001. After this is selected, then click “Open” and then “Next”.


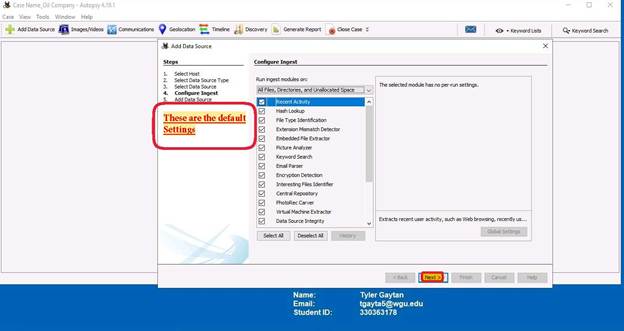
Step four of this process is configuring the ingest that will be performed on the data source. The options seen below are the default settings.
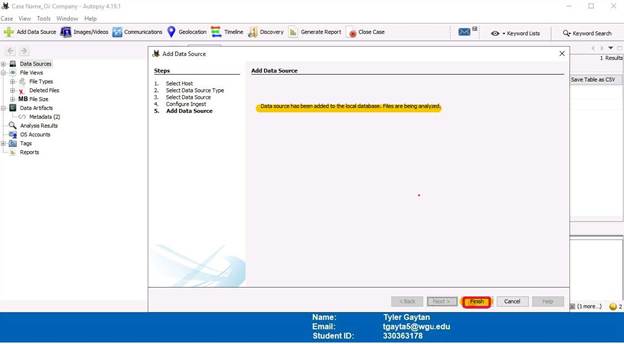
Finally, the data source has been added and will start to be analyzed.
A2. Describe all steps taken in Autopsy to identify potential evidence including data files, deleted data files, directories, or drive partitions. Provide screenshots of these steps.
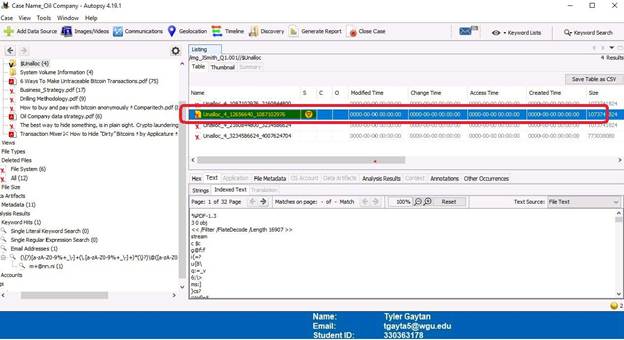
The first step displayed is deleted files that have been carved. The screenshots that follow show an overview, file selection, and then extracted to an “Export” folder. Keep in mind that in the overview screenshot, files in the “$CarvedFiles” directory also appear in the “All” directory under “Deleted Files”.
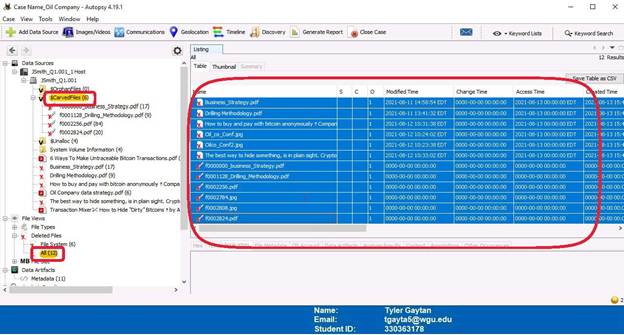
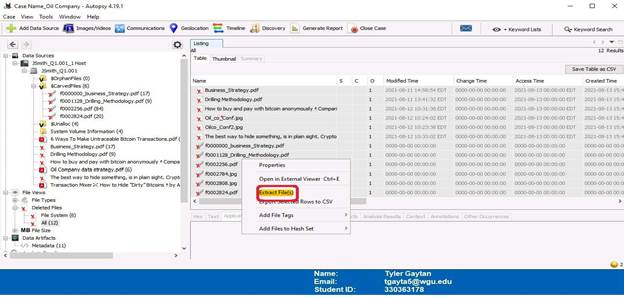

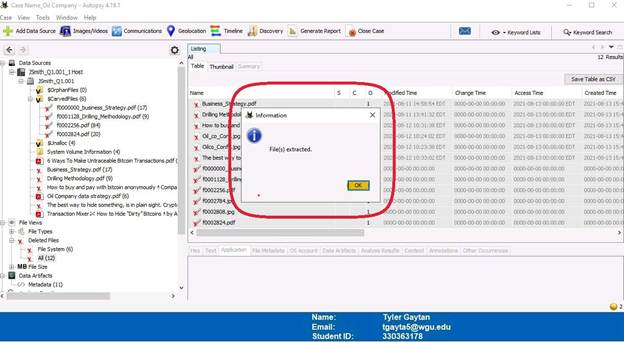
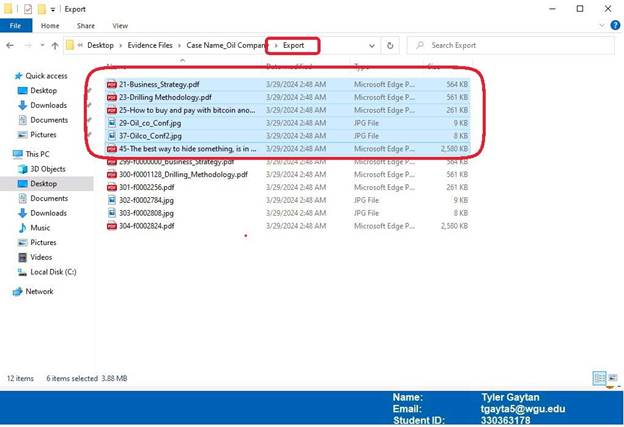
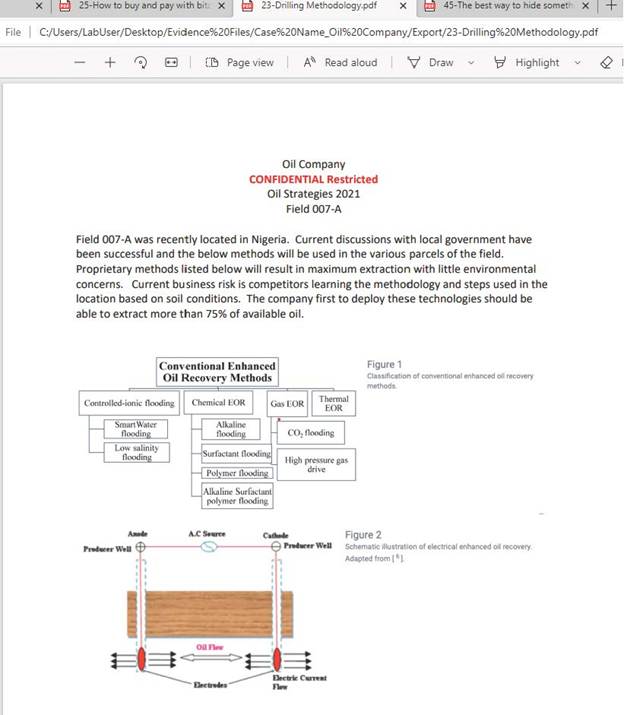
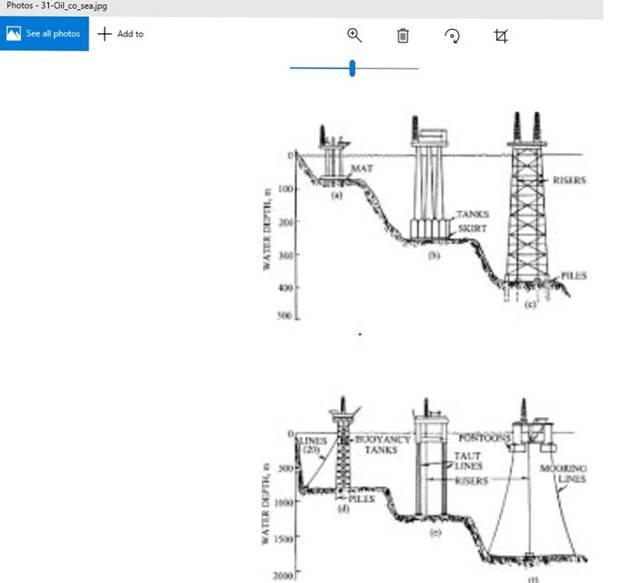
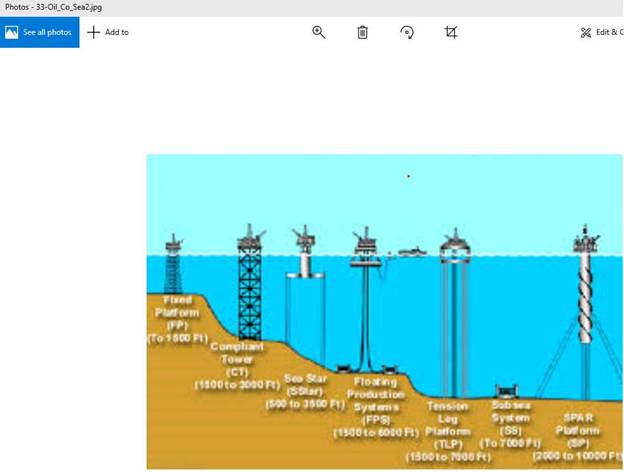
The following screenshots are files that were extracted in the previous step. The first six files, which are circled in red on the overview screenshot, are the same as the last six files. The last six files were renamed. The contents of these files displayed after the overview screenshot and will be discussed in the conclusion.

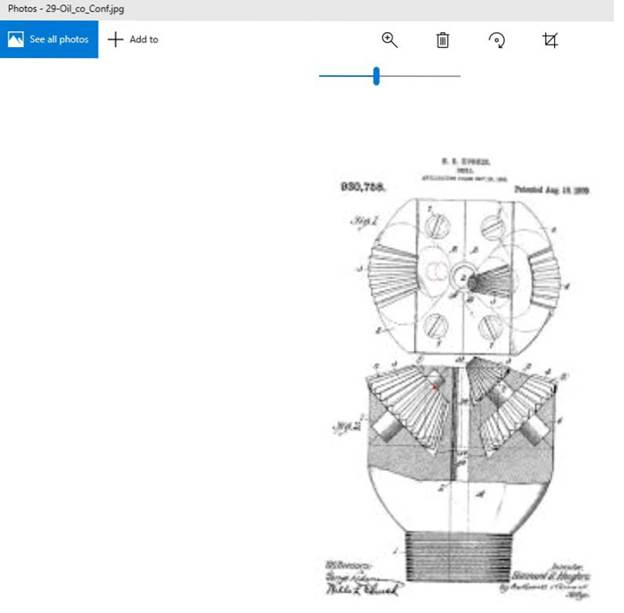
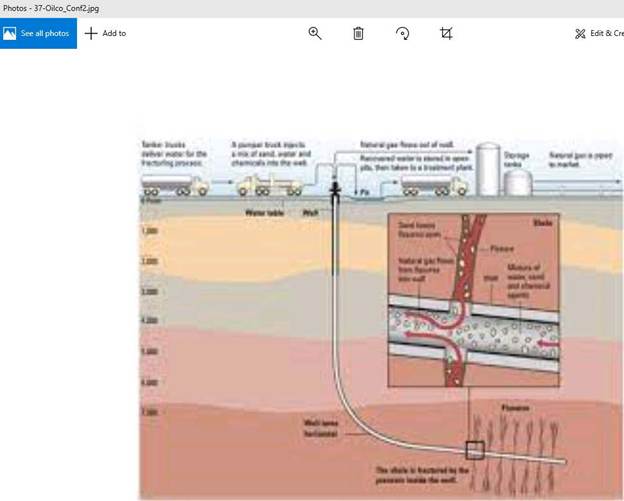
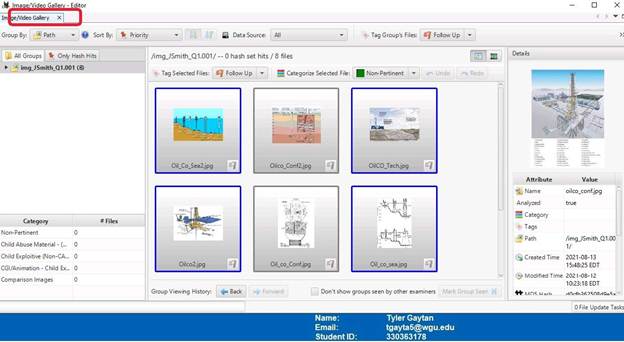
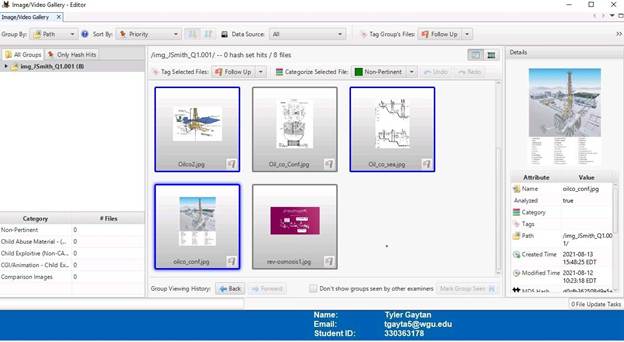
Launching the image and video gallery tool in Autopsy found additional images that could be considered important information. They are displayed below and will be reference as “additional images” in the conclusion.
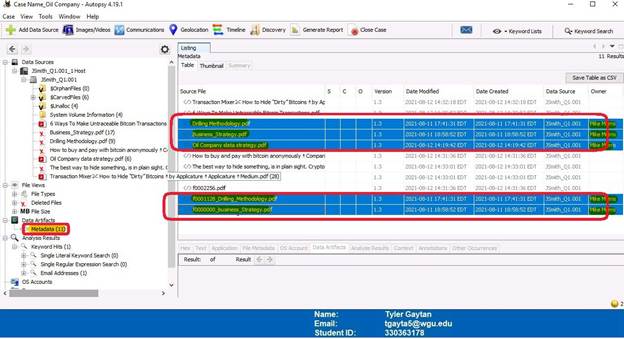
In the Metadata tab, you can find all of the files that were deleted. It can also be seen that the owner of these files is Mike Morris.
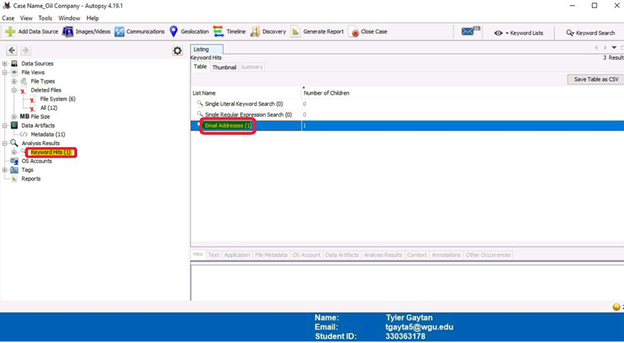
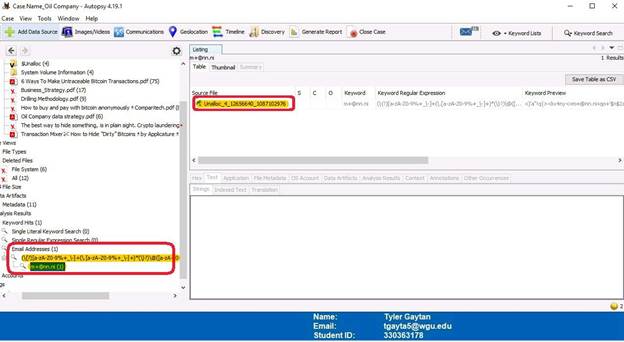
The “Keyword Hits” tab has results for an email address. Clicking into this file further displays more information and a potential route data was exfiltrated.
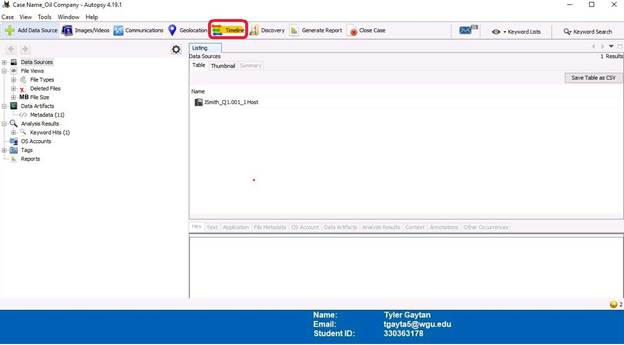
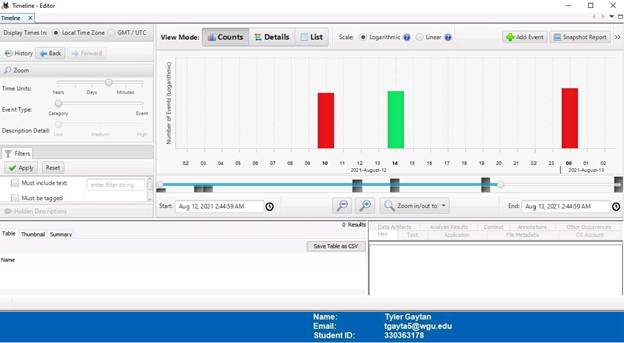
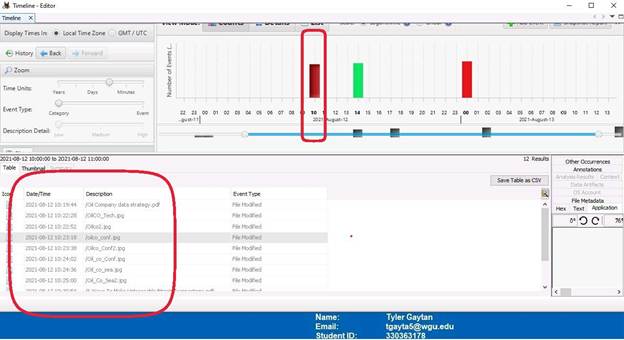
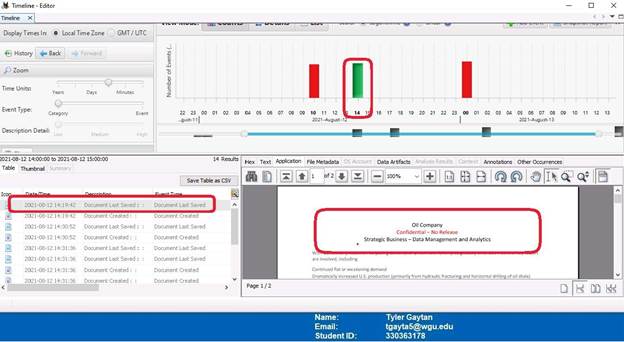
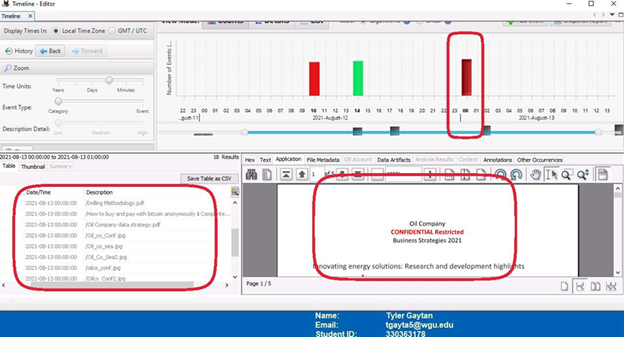
The final set of screenshots display the “Timeline” tab. This shows when and what data was access. In the screenshot with 10 (10:00 A.M.) circled, it can be seen that all the image files found thus far can be seen in the lower left window. The next screenshot with 14 (2:00P.M.) circled shows that confidential data was accessed. The final screen shot (12:00AM) shows all the files being access or modified again. This is concerning due to the time this occurred.